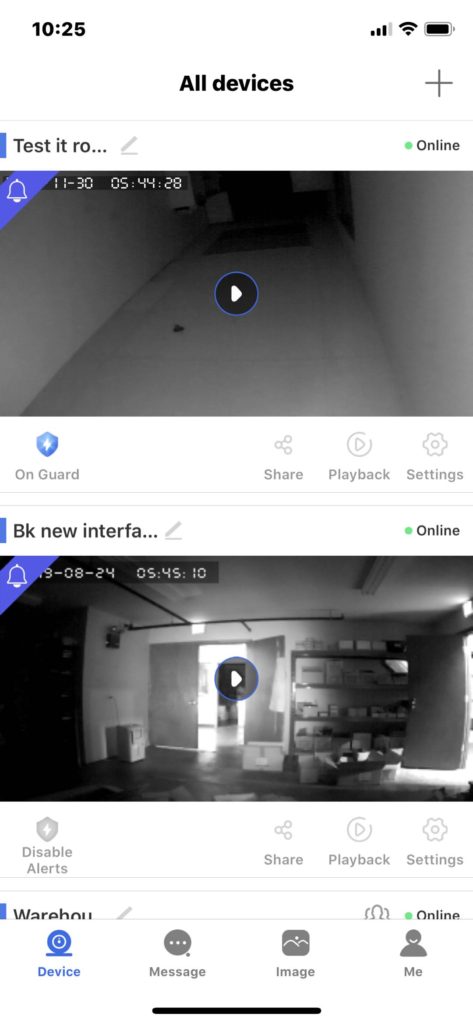
- On the bottom of device’s picture, there are four icons from left to right: arm alarm, share, playback, and setting (Figure 1).
- Click on Setting, it will show (figure 2), click the alarm settings. Then go to Alarm Settins (figure 3) turn on the Receive alarm prompt. If you also want send a video message other than normal notification, then set your mms email at Alarm Push account (check with your service provider for how to set up the MMS!)
- Click the top left corner’s go back to setting screen. If you don’t want use WiFi then disconnect the IdoorBell then go to Step 5.
- Otherwise click on the Network settings. It will jump to the screen as (figure 4) shows. It will show Wired network(checked) and WiFi (is non checked). Wait for a few seconds it will show an available WiFi list. Select the network you want, and the message ask you to confirm, if you sure then confirm the it. Your WiFi will ask you this WiFi’s password (figure 5). Then the device will try to connect to the WiFi network which you have selected. In a few seconds. It will show a check mark at your WiFi network. Don’t unplug the patch cord from your router yet. Click the back (<) then touch the picture. You will get into monitor mode. Make sure all the function works. Go out of monitor mode by click top left hand corner (<) arrow. Get into setting -> networking setting, make sure your WiFi is checked.
- If it does, then you can safely to disconnect the patch cord from router.
- Either you use wired or WiFi, you can bring it to the location to install it now.
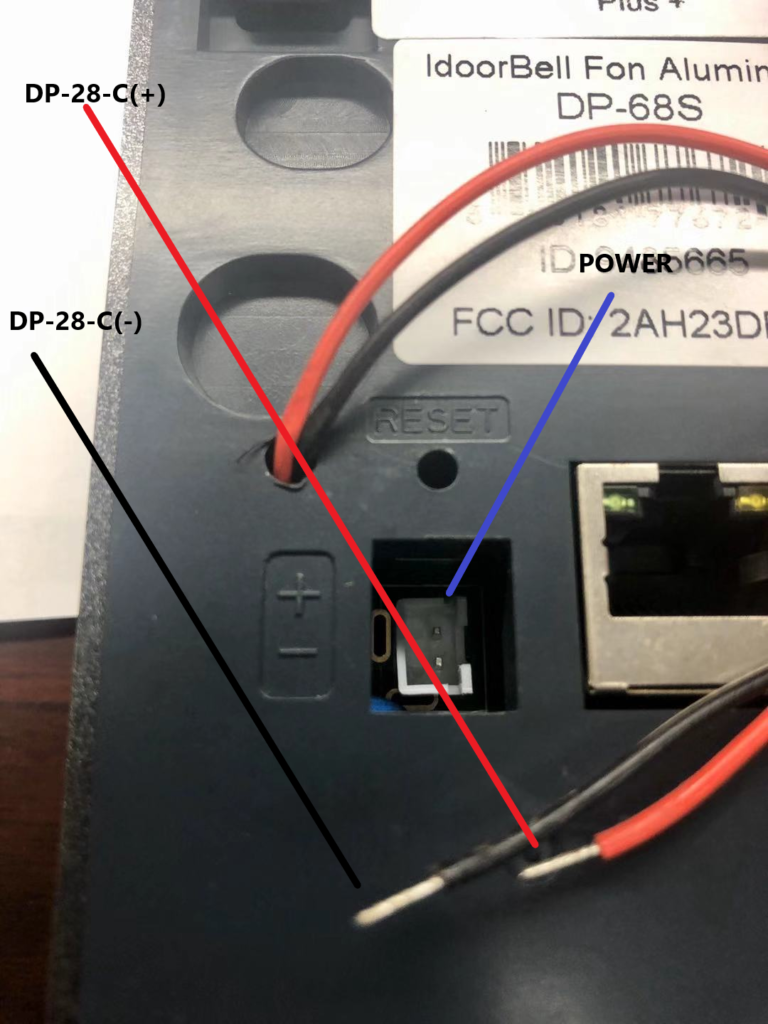
- The 2 wires at back of IdoorBell + red (+) and black (-) is for you to connect to the DP-28-C’s (+) and (-). (figure 6)